Table of Contents
- Introduction
- Connecting to the frame wirelessly
- Keeping debugging mode on permanently
- Creating the app
- Conclusion
Introduction
After acquiring a new Uhale photo frame, and with some new photos on it, I wanted to extract those photos from the frame. But I didn't have a SD card, and that's what the frame needed to export the pictures.
That's when I noticed that the frame had a micro usb port on the back. So I plugged it into a computer, and it powered on by itself. The file manager displayed it with a phone icon, and, for some reason I opened the terminal, and typed adb usb. It worked. The computer had connected to the frame via ADB. That meant it was an Android device.
But, when entering the adb shell it was a little flaky, with the computer disconnecting from the frame's adb instance frequently. This was likely my usb cord.
Connecting to the frame wirelessly
Apparently, starting the frame from the USB port enables debugging mode for the current boot. This opens the port 5555, which allows us to connect to the frame without plugging it into a computer.
This means we can connect to the device with a command such as adb connect <ip-address>.
Keeping debugging mode on permanently
If you want to be able to connect to the frame wirelessly without having to start the frame from the usb every time, you can.
- Start the frame from the USB.
- Connect to the frame:
adb connect <ip-address> - Open the settings on the picture frame:
adb shell am start com.android.settings/.Settings - Scroll down, and click
About tablet. - Tap
Build numberuntil you see the toast message that saysYou are now a developer! - Go back, open the developer options, and toggle the switch to on.
This will keep port 5555 open on every boot, letting us connect to it while the frame is running with the normal AC adapter.
To disable debugging mode, launch the settings as before and switch off developer options.
Creating the app
For this, we'll create an Android app that displays a live view of our Reolink camera in the top right corner of the picture frame display, which can be expanded by clicking on it.
Setting up the RTSP stream
Since we will be displaying the live stream using RTSP, we must first set up the RTSP server. If you already have a camera that supports RTSP, note the URL, and continue to the next step
If you have a Raspberry Pi or other linux computer that can be relied upon for your camera view, go ahead and connect to it via SSH or switch to that computer for the next steps.
Install Neolink, as shown on the Neolink GitHub repository (I am using this original version, as it seems to have better performance than the new version).
Create a configuration file for your camera, which is also shown on the GitHub repository.
Finally, start your Neolink server: ./neolink rtsp --config my_config.toml.
If you are using a battery powered camera, I recommend plugging the camera into a outlet.
Coding the Android App
Okay, now that we have our RTSP stream ready, we can start working on the app.
Create a new Android project (I usually use Android Studio).
Now, we'll change MainActivity.java to check whether we have the android.permission.SYSTEM_ALERT_WINDOW permission (which is known to the user as "Display over other apps").
public class MainActivity extends AppCompatActivity {

    @Override
    protected void onCreate(Bundle savedInstanceState) {
        super.onCreate(savedInstanceState);

        checkOverlayPermission();
    }

    public void checkOverlayPermission(){
        if (!Settings.canDrawOverlays(this)) {
            // send user to the device settings
            Intent myIntent = new Intent(Settings.ACTION_MANAGE_OVERLAY_PERMISSION);
            startActivity(myIntent);
        } else {
            // Permission granted, start the service
            startOverlayService();
        }
    }

    @Override
    protected void onResume() {
        super.onResume();
        checkOverlayPermission();
    }

    private void startOverlayService() {
        // Start the OverlayService
        Intent intent = new Intent(this, OverlayService.class);
        startService(intent);
        finish();
    }
}
In the code above, when the app is opened or refocused, it will run the checkOverlayPermission function, which checks if the permission is granted. If the permission is not granted, it opens the settings screen for the "Draw over other apps" permission.
If the permission is granted, it runs startOverlayService which starts the OverlayService class, and closes the MainActivity.
Now, we should create two drawable icons, in order to provide the best user experience.
In your apps res/drawable folder, make a file called image.xml, which contains the following:
<vector xmlns:android="http://schemas.android.com/apk/res/android"
    android:width="24dp"
    android:height="24dp"
    android:viewportWidth="24"
    android:viewportHeight="24">
  <path
      android:pathData="M21,19V5c0,-1.1 -0.9,-2 -2,-2H5c-1.1,0 -2,0.9 -2,2v14c0,1.1 0.9,2 2,2h14c1.1,0 2,-0.9 2,-2zM8.9,13.98l2.1,2.53 3.1,-3.99c0.2,-0.26 0.6,-0.26 0.8,0.01l3.51,4.68c0.25,0.33 0.01,0.8 -0.4,0.8H6.02c-0.42,0 -0.65,-0.48 -0.39,-0.81L8.12,14c0.19,-0.26 0.57,-0.27 0.78,-0.02z"
      android:fillColor="#000000"/>
</vector>
The above icon is shown to close the expanded view of the camera.
And one more, refresh_red.xml:
<vector xmlns:android="http://schemas.android.com/apk/res/android"
    android:width="24dp"
    android:height="24dp"
    android:viewportWidth="24"
    android:viewportHeight="24">
  <path
      android:pathData="M17.65,6.35c-1.63,-1.63 -3.94,-2.57 -6.48,-2.31 -3.67,0.37 -6.69,3.35 -7.1,7.02C3.52,15.91 7.27,20 12,20c3.19,0 5.93,-1.87 7.21,-4.56 0.32,-0.67 -0.16,-1.44 -0.9,-1.44 -0.37,0 -0.72,0.2 -0.88,0.53 -1.13,2.43 -3.84,3.97 -6.8,3.31 -2.22,-0.49 -4.01,-2.3 -4.48,-4.52C5.31,9.44 8.26,6 12,6c1.66,0 3.14,0.69 4.22,1.78l-1.51,1.51c-0.63,0.63 -0.19,1.71 0.7,1.71H19c0.55,0 1,-0.45 1,-1V6.41c0,-0.89 -1.08,-1.34 -1.71,-0.71l-0.64,0.65z"
      android:fillColor="#CC0000"/>
</vector>
The above icon is used when the app loses connection with the RTSP server, which upon clicking it, our code will reload the RTSP stream.
Now, we create overlay.xml in the res/layout directory. This layout is shown in the top right of the screen, and contains the VideoView, and the two buttons mentioned above.
<?xml version="1.0" encoding="utf-8"?>
<androidx.constraintlayout.widget.ConstraintLayout xmlns:android="http://schemas.android.com/apk/res/android"
    xmlns:app="http://schemas.android.com/apk/res-auto"
    xmlns:tools="http://schemas.android.com/tools"
    android:id="@+id/main"
    android:layout_width="match_parent"
    android:layout_height="match_parent">

    <VideoView
        android:id="@+id/videoView2"
        android:layout_width="300dp"
        android:layout_height="150dp"
        app:layout_constraintBottom_toBottomOf="parent"
        app:layout_constraintEnd_toEndOf="parent"
        app:layout_constraintStart_toStartOf="parent"
        app:layout_constraintTop_toTopOf="parent" />

    <ImageButton
        android:id="@+id/open_photo_frame"
        android:layout_width="wrap_content"
        android:layout_height="wrap_content"
        android:layout_marginTop="8dp"
        android:layout_marginEnd="8dp"
        android:background="@drawable/button_background"
        android:contentDescription="@string/open_picture_frame"
        android:minWidth="48dp"
        android:minHeight="48dp"
        android:src="@drawable/image"
        android:visibility="gone"
        app:layout_constraintEnd_toEndOf="parent"
        app:layout_constraintTop_toTopOf="parent" />

    <ImageButton
        android:id="@+id/refresh"
        android:layout_width="wrap_content"
        android:layout_height="wrap_content"
        android:layout_marginEnd="8dp"
        android:layout_marginBottom="8dp"
        android:background="@drawable/button_background"
        android:contentDescription="@string/refresh_camera_feed"
        android:minWidth="48dp"
        android:minHeight="48dp"
        android:src="@drawable/refresh_red"
        android:visibility="gone"
        app:layout_constraintBottom_toBottomOf="parent"
        app:layout_constraintEnd_toEndOf="parent" />

</androidx.constraintlayout.widget.ConstraintLayout>
And finally we create OverlayService.java, which MainActivity.java starts. This is the core of the application, which handles showing the layout above, and handling the RTSP stream.
public class OverlayService extends Service {
    private static final int NOTIFICATION_ID = 1;
    private static final String CHANNEL_ID = "notifications";
    private WindowManager windowManager;
    private View overlayView;
    private MediaPlayer mediaPlayer;

    @Override
    public void onCreate() {
        super.onCreate();
        Handler handler = new Handler(getMainLooper());
        createNotificationChannel();
        startForeground(NOTIFICATION_ID, createNotification());

        String rtspUrl = "rtsp://<ip-address>:8554/<reolink-camera>/mainStream";
        Uri uri = Uri.parse(rtspUrl);

        // Initialize WindowManager
        windowManager = (WindowManager) getSystemService(WINDOW_SERVICE);

        // Initialize overlay view from the layout XML
        overlayView = LayoutInflater.from(this).inflate(R.layout.overlay, null);

        ImageButton photoFrameBtn = overlayView.findViewById(R.id.open_photo_frame);
        photoFrameBtn.setOnClickListener(this::openFrame);

        VideoView videoView = overlayView.findViewById(R.id.videoView2);

        ImageButton refreshBtn = overlayView.findViewById(R.id.refresh);
        refreshBtn.setOnClickListener(v -> {
            handler.post(new Runnable() {
                @Override
                public void run() {
                    videoView.setVideoURI(uri);
                    videoView.start();
                }
            });
        });

        videoView.setOnPreparedListener(new MediaPlayer.OnPreparedListener() {
            @Override
            public void onPrepared(MediaPlayer mp) {
                mediaPlayer = mp;
                mp.setVolume(0f, 0f);
                handler.post(new Runnable() {
                    @Override
                    public void run() {
                        refreshBtn.setVisibility(View.GONE);
                    }
                });
            }
        });

        videoView.setOnCompletionListener(new MediaPlayer.OnCompletionListener() {
            @Override
            public void onCompletion(MediaPlayer mp) {
                handler.post(new Runnable() {
                    @Override
                    public void run() {
                        refreshBtn.setVisibility(View.VISIBLE);
                    }
                });
            }
        });

        videoView.setOnTouchListener(this::openReolink);
        videoView.setVideoURI(uri);
        videoView.start();

        // Set layout parameters for overlay view
        WindowManager.LayoutParams params = new WindowManager.LayoutParams(
                WindowManager.LayoutParams.WRAP_CONTENT,
                WindowManager.LayoutParams.WRAP_CONTENT,
                WindowManager.LayoutParams.TYPE_SYSTEM_ALERT,
                WindowManager.LayoutParams.FLAG_NOT_FOCUSABLE,
                PixelFormat.TRANSLUCENT
        );

        // Set gravity to top right
        params.gravity = Gravity.TOP | Gravity.END;

        // Add the view to the window
        windowManager.addView(overlayView, params);
    }

    @Override
    public int onStartCommand(Intent intent, int flags, int startId) {
        // Handle start command if needed
        return START_STICKY; // Service will be restarted if terminated by the system
    }

    public boolean openReolink(View view, MotionEvent event) {
        Log.d("OverlayService", "openReolink: run");
        ImageButton photoFrameBtn = overlayView.findViewById(R.id.open_photo_frame);
        VideoView videoView = overlayView.findViewById(R.id.videoView2);
        ViewGroup.LayoutParams lp = videoView.getLayoutParams();
        lp.height = MATCH_PARENT;
        lp.width = MATCH_PARENT;
        videoView.setLayoutParams(lp);
        photoFrameBtn.setVisibility(View.VISIBLE);
        // Set layout parameters for overlay view
        WindowManager.LayoutParams params = new WindowManager.LayoutParams(
                WindowManager.LayoutParams.WRAP_CONTENT,
                WindowManager.LayoutParams.WRAP_CONTENT,
                WindowManager.LayoutParams.TYPE_SYSTEM_ALERT,
                WindowManager.LayoutParams.FLAG_NOT_FOCUSABLE,
                PixelFormat.TRANSLUCENT
        );

        // Set gravity to top right
        params.gravity = Gravity.TOP | Gravity.END | Gravity.BOTTOM | Gravity.START | Gravity.CENTER;
        windowManager.updateViewLayout(overlayView, params);
        if (mediaPlayer != null) {
            mediaPlayer.setVolume(1f, 1f);
        }
        return true;
    }

    public void openFrame(View view) {
        ImageButton photoFrameBtn = overlayView.findViewById(R.id.open_photo_frame);
        VideoView videoView = overlayView.findViewById(R.id.videoView2);
        ViewGroup.LayoutParams lp = videoView.getLayoutParams();
        lp.height = 150;
        lp.width = 300;
        videoView.setLayoutParams(lp);

        photoFrameBtn.setVisibility(View.GONE);

        // Set layout parameters for overlay view
        WindowManager.LayoutParams params = new WindowManager.LayoutParams(
                WindowManager.LayoutParams.WRAP_CONTENT,
                WindowManager.LayoutParams.WRAP_CONTENT,
                WindowManager.LayoutParams.TYPE_SYSTEM_ALERT,
                WindowManager.LayoutParams.FLAG_NOT_FOCUSABLE,
                PixelFormat.TRANSLUCENT
        );

        if (mediaPlayer != null) {
            mediaPlayer.setVolume(0f, 0f);
        }

        // Set gravity to top right
        params.gravity = Gravity.TOP | Gravity.END;
        windowManager.updateViewLayout(overlayView, params);
    }

    private void createNotificationChannel() {
        if (Build.VERSION.SDK_INT >= Build.VERSION_CODES.O) {
            CharSequence name = "Background Service";
            String description = "Notification when displaying over other apps";
            int importance = NotificationManager.IMPORTANCE_MIN;
            NotificationChannel channel = new NotificationChannel(CHANNEL_ID, name, importance);
            channel.setDescription(description);

            NotificationManager notificationManager = getSystemService(NotificationManager.class);
            notificationManager.createNotificationChannel(channel);
        }
    }

    private Notification createNotification() {
        NotificationCompat.Builder builder = new NotificationCompat.Builder(this, CHANNEL_ID)
                .setContentTitle("Displaying over Photo Frame")
                .setContentText("Reolink service active")
                .setSmallIcon(R.drawable.camera_outdoor); // Replace with your notification icon
        return builder.build();
    }

    @Nullable
    @Override
    public IBinder onBind(Intent intent) {
        return null;
    }

    @Override
    public void onDestroy() {
        super.onDestroy();
        if (overlayView != null) {
            windowManager.removeView(overlayView);
        }
    }
}
When the OverlayService is launched by MainActivity, the onCreate function executes. Inside this function, we define a Handler. This is used to modify Views from click listeners. Next, we run createNotificationChannel. This creates the notification channel for the foreground notification, using NotificationManager and new NotificationChannel. After the notification channel has been created, we use the system's startForeground function, and display the notification. This calls the createNotification function, which uses NotificationCompat.Builder to return a notification, which the startForeground function displays.
After doing the notification work, we move onto actually displaying the View. First, we define the RTSP URL, which we'll display the stream from, and convert it to a uri using Uri.parse.
We get access to the WindowManager, be calling getSystemService(WINDOW_SERVICE).
Now, we inflate the View from overlay.xml, using LayoutInflater.from(this).inflate.
We get access to the buttons and videoview using View.findViewById.
We attach a listener to refreshBtn that calls VideoView.setVideoURI, and VideoView.start, to re-initialize the VideoView, and a listener to photoFrameBtn, which calls openFrame.
Then we attach an OnPreparedListener to the video view, which uses the MediaPlayer object passed to it to mute the sound, and hide the refresh button, in case it is shown.
The code also attaches a OnCompletionListener, which sets the refresh button to be visible when the video stops being streamed to the device.
After that, it adds a OnTouchListener to the VideoView which calls the openReolink function, sets the video URI using VideoView.setVideoURI, and finally starts the stream using VideoView.start.
Now that the buttons and video are set up, the code creates a instance of WindowManager.LayoutParams, and then sets params.gravity to Gravity.TOP | Gravity.END to put the View in the top right, and attaches the View to the display using windowManager.addView(overlayView, params).
The service also implements onStartCommand, which returns START_STICKY to make the service restart if it is killed by the system.
In the openReolink function, the program gets the layout params from the VideoView, and sets the width and height to MATCH_PARENT. It then sets the photo frame button to visible, and creates an instance of WindowManger.LayoutParams and sets the gravity to Gravity.TOP | Gravity.END | Gravity.BOTTOM | Gravity.CENTER to make the VideoView fill the whole screen. It then updates the layout params by calling windowManager.updateViewLayout. Finally, it sets the volume of the video to 100% using mediaPlayer.setVolume(1f, 1f).
In the openFrame function, we set the videoview size to 150x300 again, hide the photo frame button, reset the LayoutParams to what we originally set it in the onCreate function, and mute the video view again.
The service also implements onBind, which just returns null, and onDestroy, which removes the view from the display using windowManager.removeView.
Make sure to replace the rtspUrl variable with the URL for your RTSP stream!
Add the Service to the Manifest
In your app's AndroidManifest.xml, add the tag for your Service inside the application tag:
<service android:name=".OverlayService" />And add the required permissions above the application tag:
<uses-permission android:name="android.permission.INTERNET" />
<uses-permission android:name="android.permission.SYSTEM_ALERT_WINDOW" />
Run the app
Now you can run the app on your photo frame, if you are connected to it via ADB. It should open the settings screen for Display over other apps. Find the app and toggle it on. You should now see your camera in the top right of the screen! Click on it to open the expanded view.
Conclusion
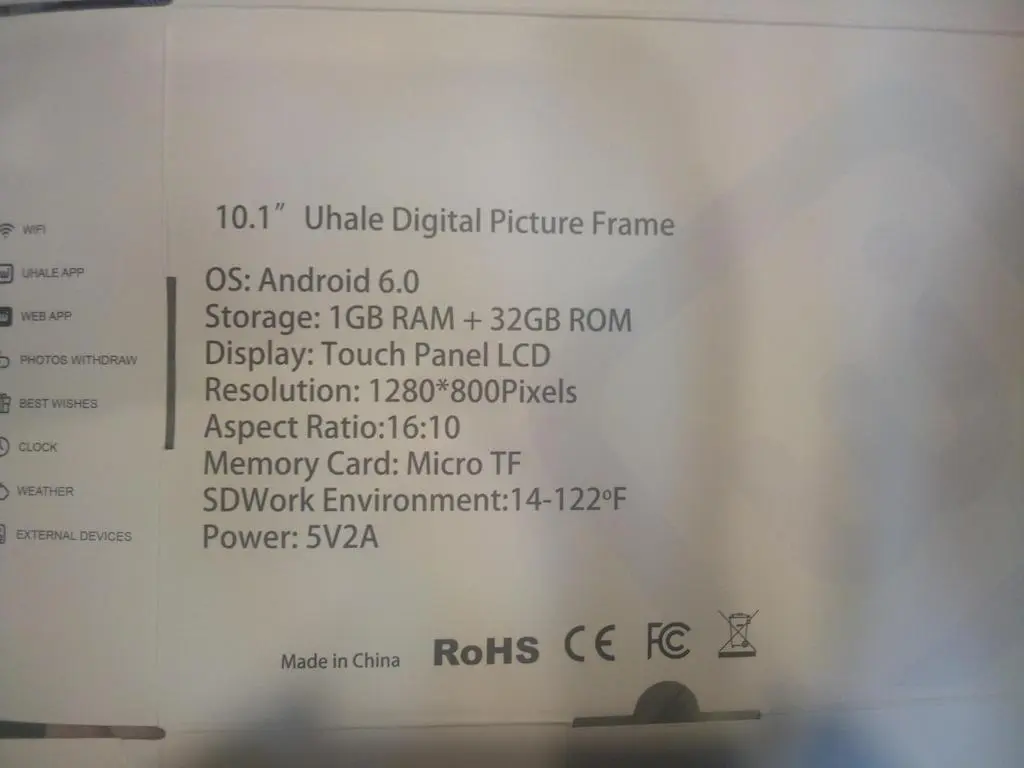
You can run any android app that has a minium SDK version of 23 or lower (Android 6 or lower) on a Uhale Photo Frame, and it can be useful for a variety of reasons. You can expand the program above to display multiple cameras, or even use it for something totally different, like displaying a quick action bar to open apps you've installed on it.
If you want to extract the photos from the frame wirelessly, like I did, you can use the following python script I wrote:
import subprocess

adb_binary = "adb"
dest_folder = "./Photos/"

filesr = subprocess.run([adb_binary, "shell", "cd", "/storage/emulated/0/ZWhalePhoto/resource", "&&", "ls"], stdout=subprocess.PIPE)
files = filesr.stdout.decode()
num = 0
output = ""
for file in files.split("\n"):
    if ("greeting" not in file and "_thumbnail" not in file and file.strip() != ""):
        num = num + 1
        print("Grabbing photo " + str(num))
        fileuri = "/storage/emulated/0/ZWhalePhoto/resource/" + file.strip()
        desturi = dest_folder + "photo" + str(num) + ".jpg"
        r = subprocess.run([adb_binary, "pull", fileuri, desturi], stdout=subprocess.PIPE)
        output = output + "\n" + r.stdout.decode()

with open("out.txt", "w") as w:
    w.write(output)
When I finished making my app, I noticed that the box for the frame actually says it runs Android 6:
🙂